Hard Drive Management - APP
The screenshots and options shown in this article are for reference only. Actual displays may vary depending on the system version, app version, or device model. The images are primarily intended to guide users through specific operations; please refer to the actual interface.
Hard Drive Management
- Access: Click [System Settings -> Hard Drive Information] to view a clear overview of the hard drive information for all slots on your current device:
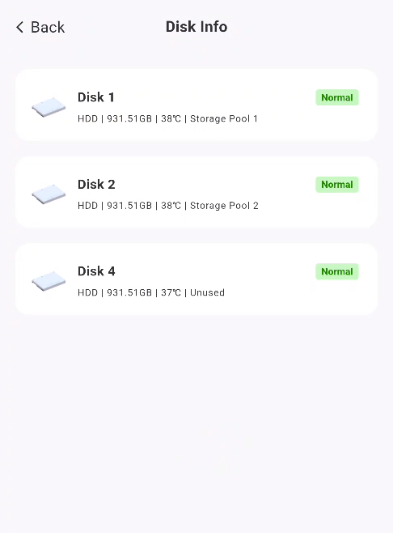
- **Basic Information: **Displays the drive bay name (e.g., Drive 1 corresponds to Bay 1), health status (e.g., “Normal”), drive type (HDD/SSD), total capacity, real-time temperature, and the storage pool to which it belongs.
- View Basic Properties
Click the hard drive whose basic properties you want to view in the hard drive list to view its relevant parameters:
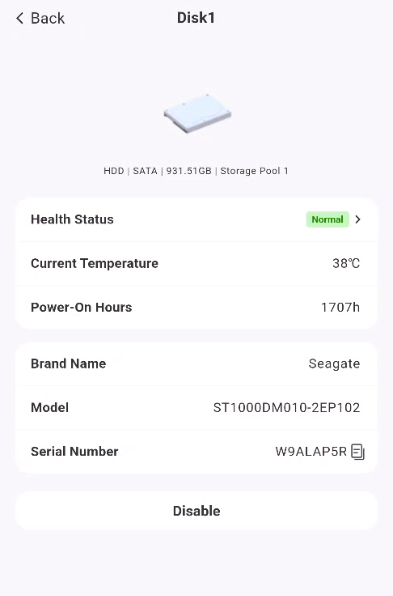
- Hardware information such as the hard drive model, serial number (SN), hours of use, and current temperature.
- SMART Information on Health Status Details
Click [Health Status] to view detailed SMART information about the disk and access the hard drive health check feature.
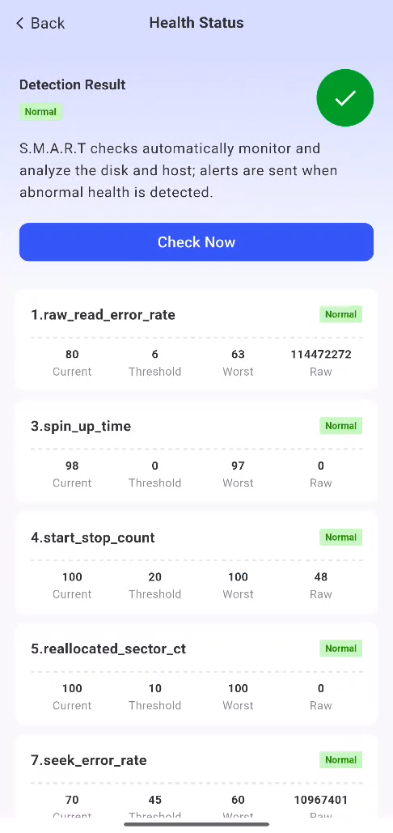
Note:
-
The specific SMART information supported by each hard drive varies by manufacturer.
-
The results for each attribute value are for reference only; the specific meaning of some items depends on the manufacturer.
- Hard Drive Health Check
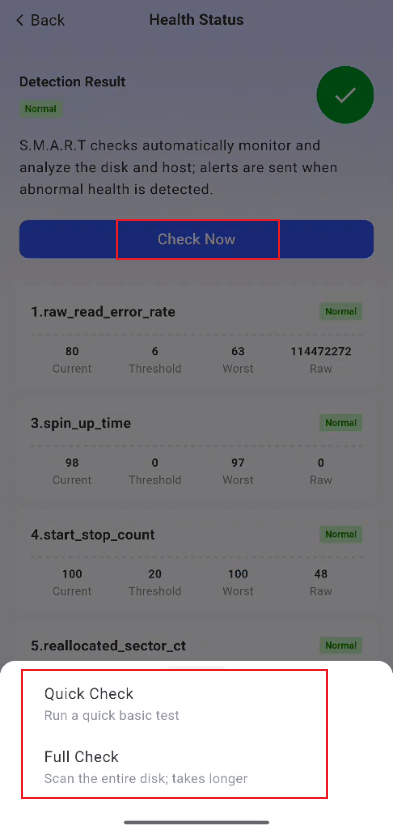
Click "Check Now" -> "Quick Check" / "Full Check." The corresponding progress bar will appear. Once the check is complete, the SMART information will be updated, and the results will be displayed.
-
**Quick Scan: **Checks only key areas of the hard drive (such as circuits, read/write heads, and a small number of random sectors), typically covering about the first 5% of storage space. It generally places a low I/O load on the system and has minimal impact, usually completing in just a few minutes.
-
**Full Scan: **Performs a complete scan of all sectors on the hard drive, verifying data integrity sector by sector, and can detect deeper-level media issues. However, it places a high load on the system, so it is recommended to run it during idle periods; it typically takes several hours.
Important Notes
-
If a hard drive enters an "alert" or "error" status, we recommend replacing the drive promptly and backing up your data.
-
Improper installation or a faulty hard drive may result in data loss. Therefore, be sure to back up your data before installing a hard drive.
-
When removing or installing a hard drive, make sure the NAS device is turned off and the power cord is unplugged.